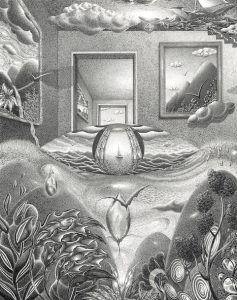
Let your first pencil lines be strong, graceful and light. You are not tracing or trying to get it right the first time. Your first lines are simply exploratory. You are creating, doing at this moment what no one has ever done before you. Do not hesitate or draw the line in segments. Instead, let your intuition or feelings guide your line but press lightly that you may erase and change it endlessly until each line has the perfect elegance or tension. You will know the difference, one line will be good but improved when redrawn. When I sketch the outline of a tree for example, my first line is spontaneous but I will refine it again and again, erasing each time the previous line otherwise my drawing would be a confusion of lines with no clear boundaries.
Pencils range from 9B which are soft and dark to 9H which are hard and light. B stands for Black and H for Hard. By adding more and more clay, the graphite becomes lighter but also harder. Starting with 9B (almost pure graphite) to 8B, 7B, 6B, 5B, 4B, 3B, 2B, HB (the equivalent of a #2 pencil) then on to H, 2H, 3H, 4H, 5H, 6H, 7H, 8H and finally 9H. To sketch, I prefer to use a 2B or HB pencil which are neither too dark or too hard. The darker pencils are hard to erase as are the lighter one as the later leave a groove or indentation in the paper. I will use a 6B here and there for darker touches and a 2H occasionally for a very light area. As to pen and ink, one of my next blog will address its supplies. But the strokes remain essentially the same.
My initial sketch outlines the different areas that I will fill in later with pencil or pen and ink strokes. I will generally work on the background first, then the middle ground followed by the foreground. Things that are closer to us have more details, the colors are more intense, the highlights brighter, the shadow darker and the contrast more intense. As they recede, they fade and become smaller and paler. If I am drawing a tree with the sky for background, I will work on the sky first and then know how much work I need to do on the tree which is closer to make it stand out from its background. Thus, I block areas and work them individually from back to front.
Remember that there is no outside line in anything that you see. It is subtle shading, distance, different texture or luster that give you the illusion of boundaries. Of course you need a line to see what you are drawing but keep very light. The harder you press on the outside line, the less dimensional your drawing appear.
Treat each area individually using different techniques as if there were different musical instruments in an orchestra. Your drawing will be monotonous and flat if you repeat the same techniques. The sky has a different texture than a tree. Make your strokes follow the contour of the object you are working. If you are drawing blades of grass, sometimes press hard, sometimes light; vary your strokes, some short, some long or they will look like uniform grave markers at Gettysburg. Like in a ballet, use choreography to bring all these elements together and create a final harmony. Have them espouse the same light, be consistent with your shadows, vary your strokes and treatment.
When I wish to draw a sky, I do not try to replicate a sky. The sky has a luminosity and a feeling of infinity that can not be reproduced (how to draw air). Instead I try to convey the energy of the sky and what it feels like. When I draw a river or waves, I do not attempt to copy them but to suggest their movement, energy and direction with strokes guided by my feeling of water. Think of the many ways you can draw a tree or treat its leaves. It is the quality and the magic of your strokes that will give life to your drawing, not its exactitude or realism.
Before starting a drawing, create different thumbnails. Do a succession of ten seconds drawings and place the elements of your drawing differently, the sun to the left, then to the right, try two trees instead of three, make a hill smaller then larger. One thumbnail will appeal to you more than the others. It is better than starting an area in detail to realize later that you do not like the general composition. Before committing to your final drawing, experiment with various and brief compositions.
Always press lightly. To make things darker, add successive layers with the same light pressure. Do not use your fingers or a stomp to blend or your drawing will appear flat. With layers built upon layers, the strokes will disappear and felt together, but the direction of your strokes will remain and light will come through creating depth. Shade is not the annihilation of light. You can see details and texture in the shade. Mix it up with some lighter areas in the shade and darker areas in the light. Nature is very subtle.
The sheet of paper you are drawing on is one dimensional, it is forever flat and has no depth. Your objective besides creating a beautiful drawing is to fool the eye and make it appear three dimensional. For this you must convey to everything you draw a sense of volume, mass and depth using shading and basic rules of perspective. Take lessons in fundamental drawing. You need some basic understanding of light and shade, on how circles seen at angle become ellipses and in three dimensional perspective. As I have said before, the techniques will come; what matters most is the poetry you have to share and the light inside of you.


Leave A Comment